We hope that you never need a return, refund, or exchange! However, we understand sometimes things don’t work out…and we also make mistakes! We really, really, really hate it when we do make a mistake…and we are super hard on ourselves when we do! Nonetheless, it happens despite our best efforts!
When you shop at Walmart or Amazon, they have a gazillion employees and a gazillion dollars to handle these types of issues. When you shop BigBabyGorillaBear.Com, we are a very boutique operation with limited resources. That is why we have designed this guide to assist you with the return process.
First off – make sure you read our return policy here! This will ensure you are familiar with the limitations and nuances of the return policy. Next, we will cover some examples of what you might need to do to qualify for a reprint, refund, or exchange.
For many examples, we will need some pictures of the issue. A single picture of the issue might show the problem, but we might require some additional images. Let’s look at the example below:
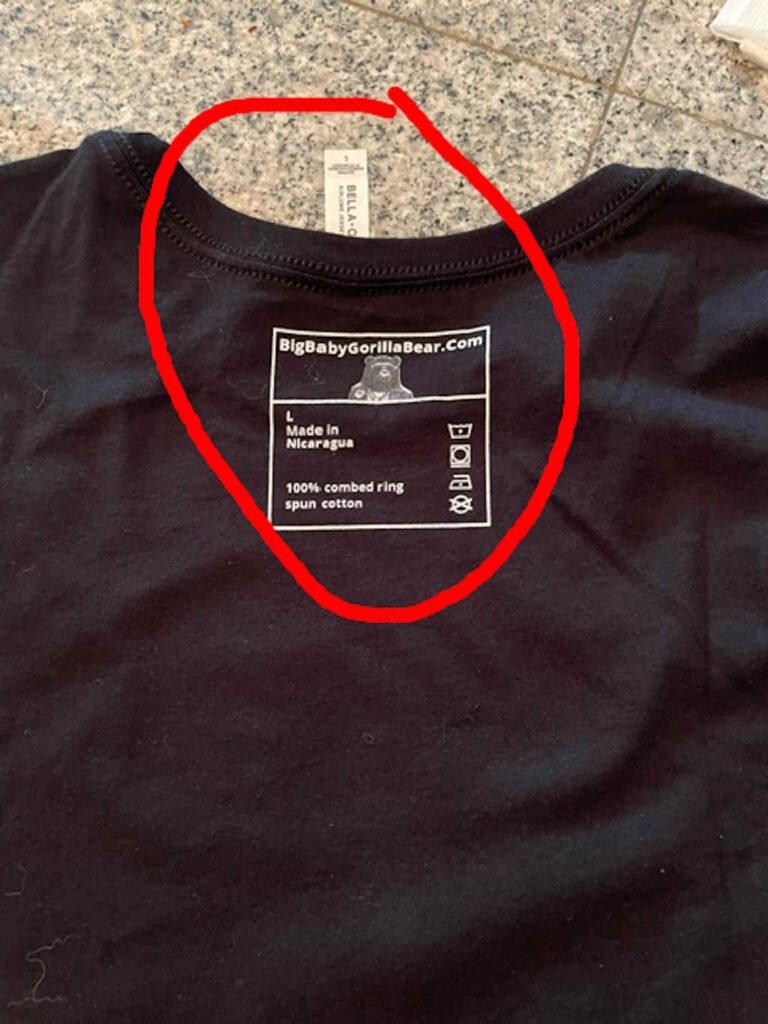
In the example above, the product tag / branding label is visible. However, without the white tag sticking out from the inside of the shirt, it would be difficult to discern where the label is on the shirt. In this example, the branding label was printed on the backside of the shirt instead of inside the shirt.
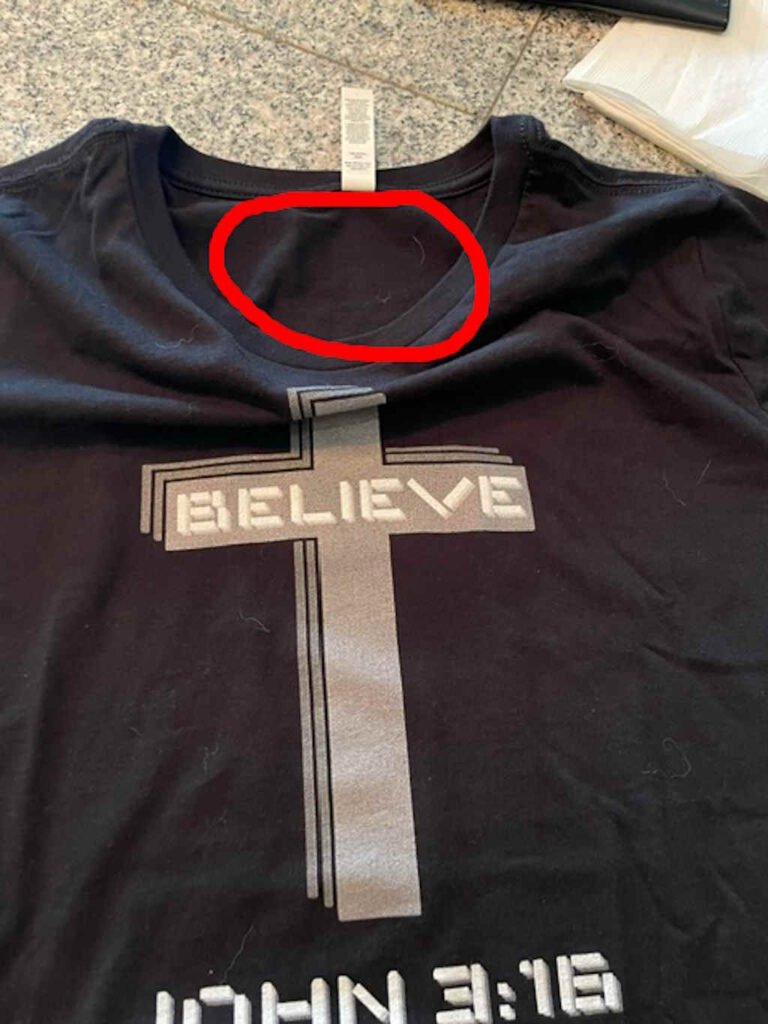
Notice how the image above adds context. First, the main graphic of the shirt can be seen. This illustrates to the manufacturing team that this is the actual shirt that was just shipped. Second, the second picture shows the inside of the shirt near the collar with the tag flipped up, further illustrating that the product tag / branding label is missing from the inside of the shirt (and actually printed on the outside of the back of the shirt!).
This example highlights why multiple images with a frame of reference is important! When possible, show the issue in the same frame as the main shirt image. (More examples provided below).
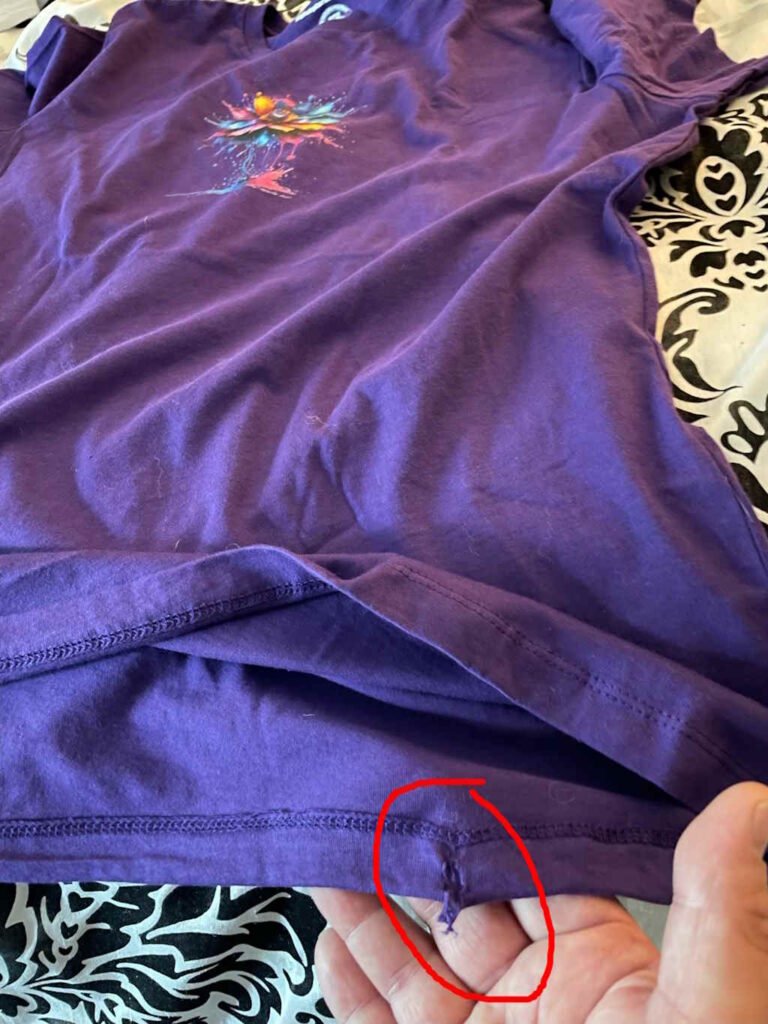
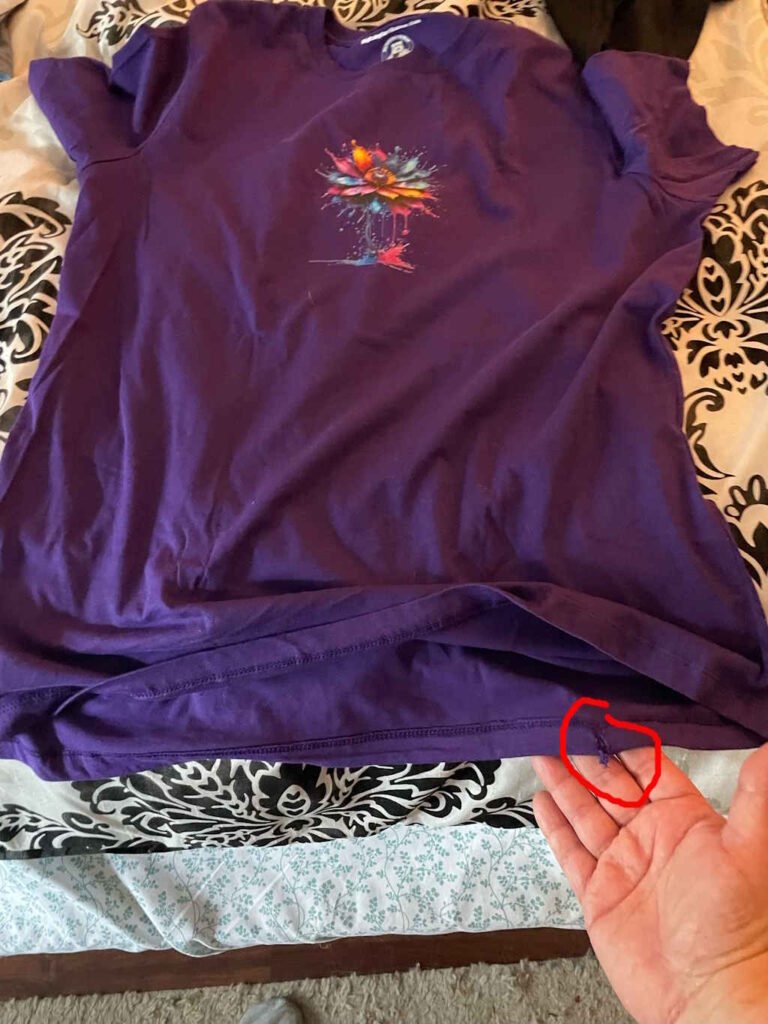
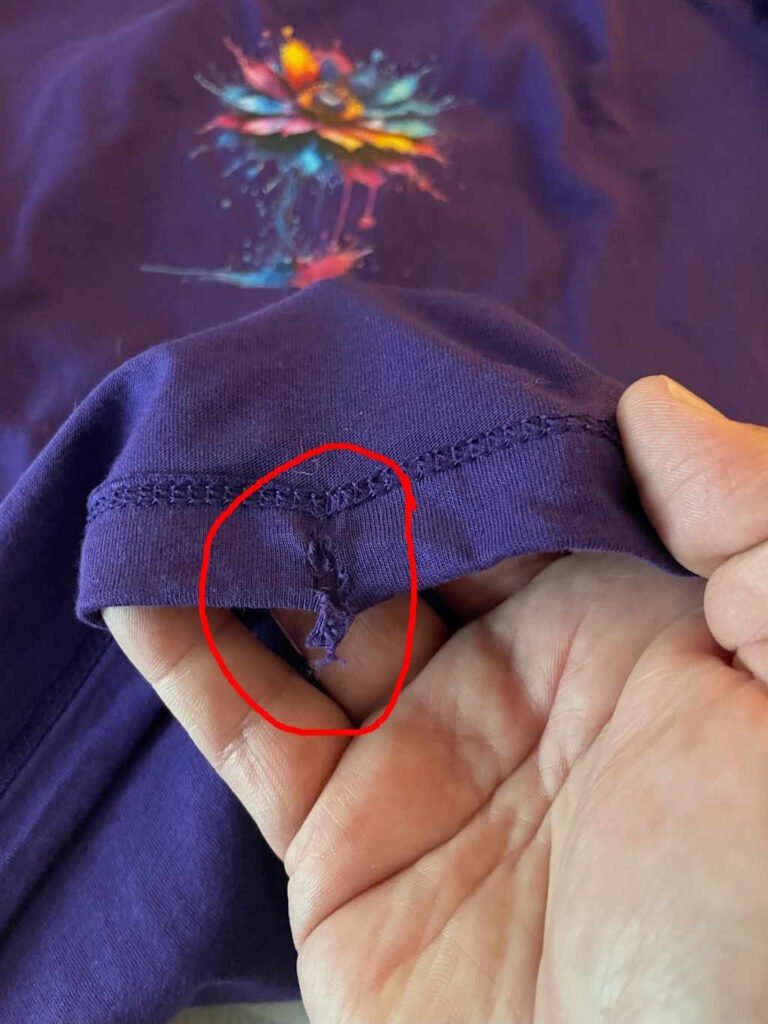
In the images above, notice how the images captures the main product features, but also points out the product issue. These types of images will expedite the return, refund, or exchange process!
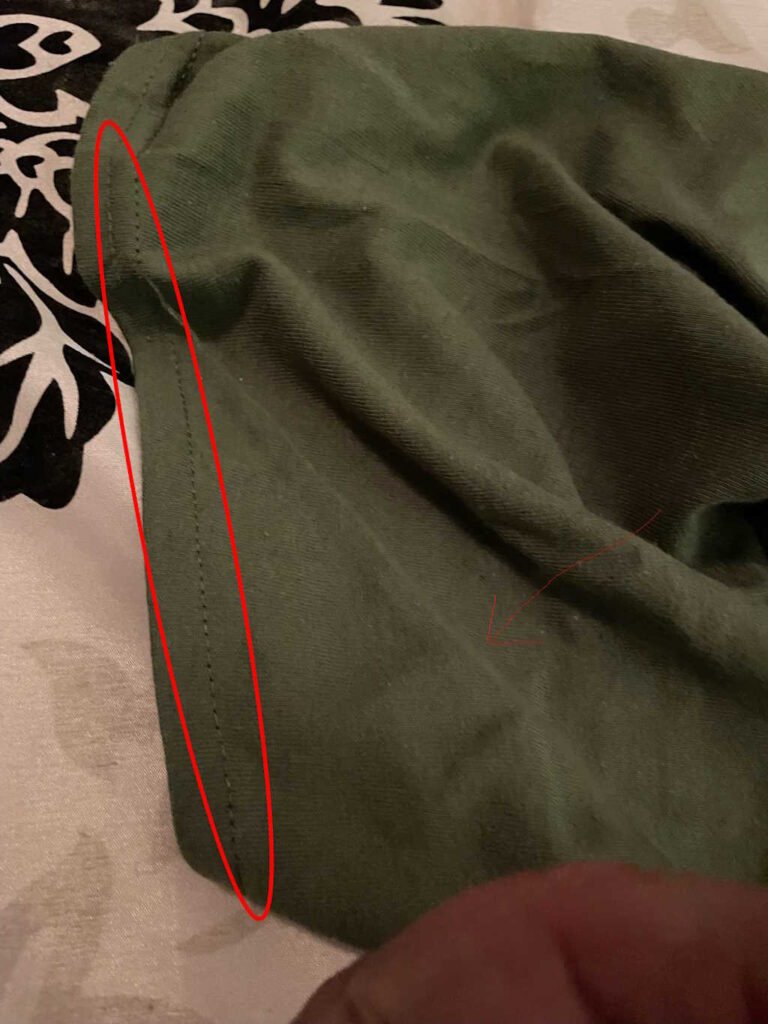
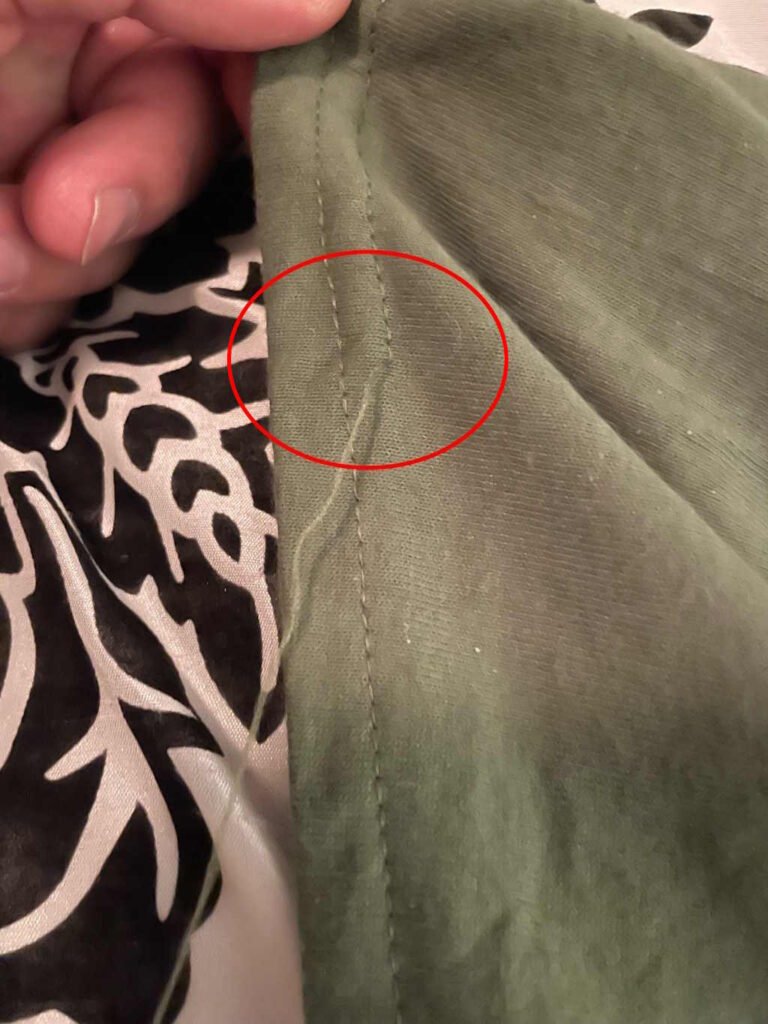
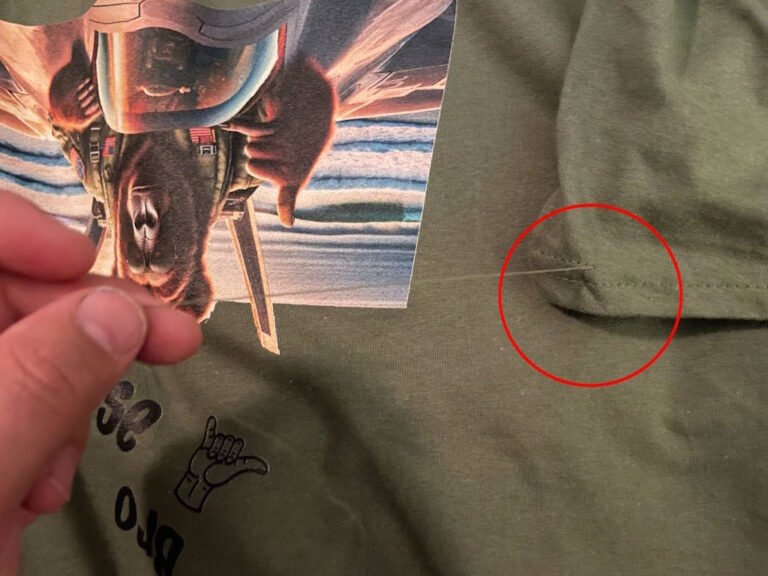
In the images above, notice again how the images show the whole picture of the issue including the product features. Please keep this in mind and follow these examples to ensure that we can address your issues in the most timely manner!
Sometimes the defects are less obvious. For example, occasionally, the t-shirt blanks that are used are not always uniform. It is normal for some level of variance in any manufacturing process. This is very common with certain types of apparel and clothing. However, these variances should not be significant (which is subjective…we know). In these instances, we have to rely on the manufacturers of the apparel, and industry knowledge.
Below is an example of a shirt that is right on the edge of fitting a bit off. The sleeves of the shirt tend to ride up high on the shoulders, and they pull in towards the arm pits. Taking good images of these concerns is the first step towards determining the issue, and working towards making these issues right! See example images below:
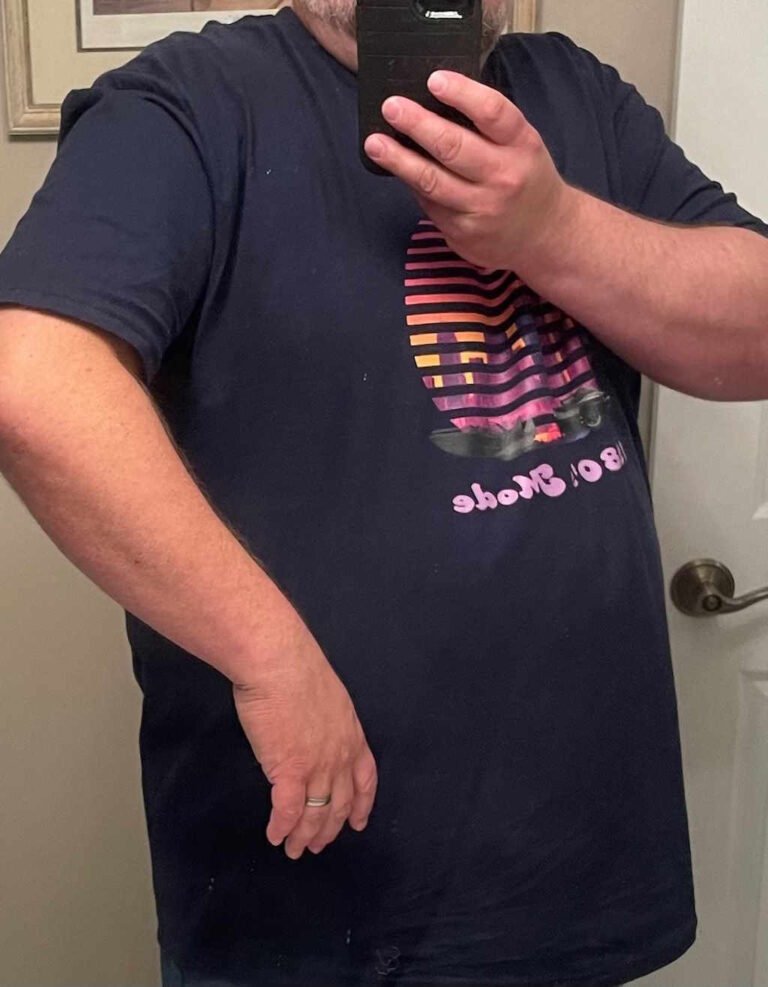
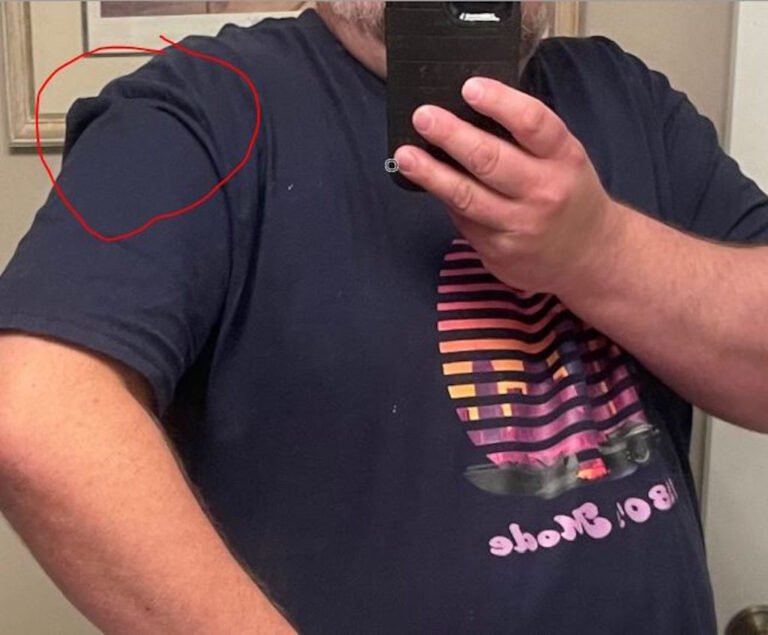
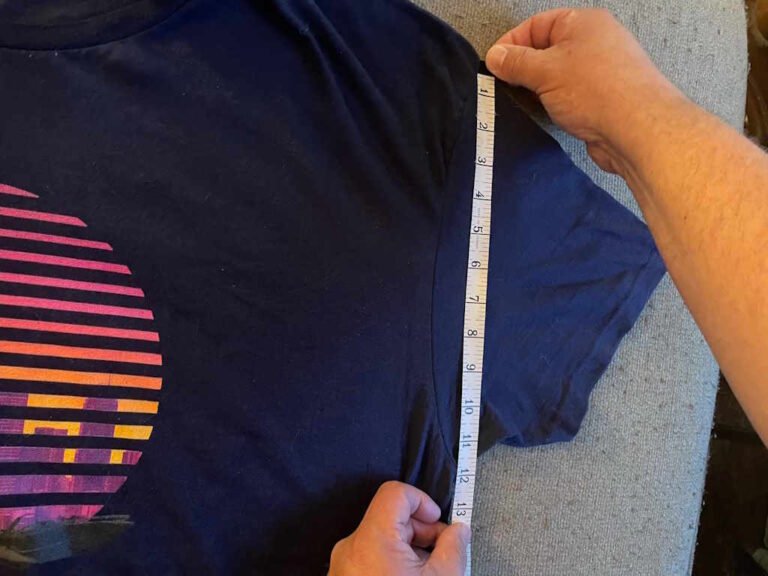
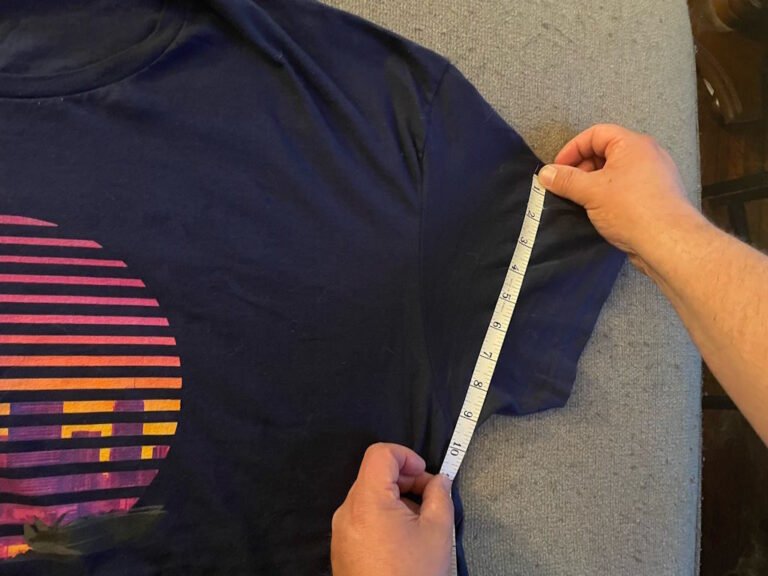
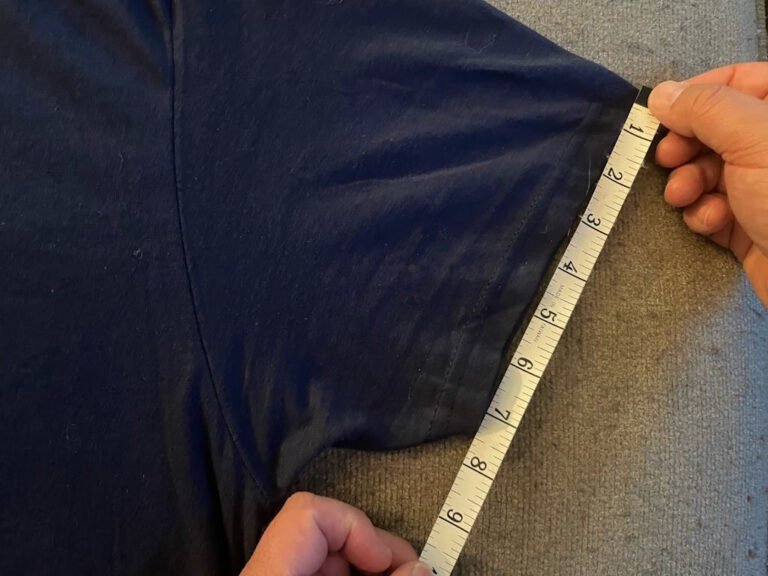
Looking at the examples above, hopefully you have a better idea of the things needed to expedite the return, refund, and exchange process! The more information provided, the smoother and easier the process will be! As always, if you need assistance, please reach out to us here!
